Designing a Parametric Pawn in Onshape Using Variables for Instant Resizing
Jun 05, 2025This is the first lesson in our Chess Set series.
Why start with the pawn?
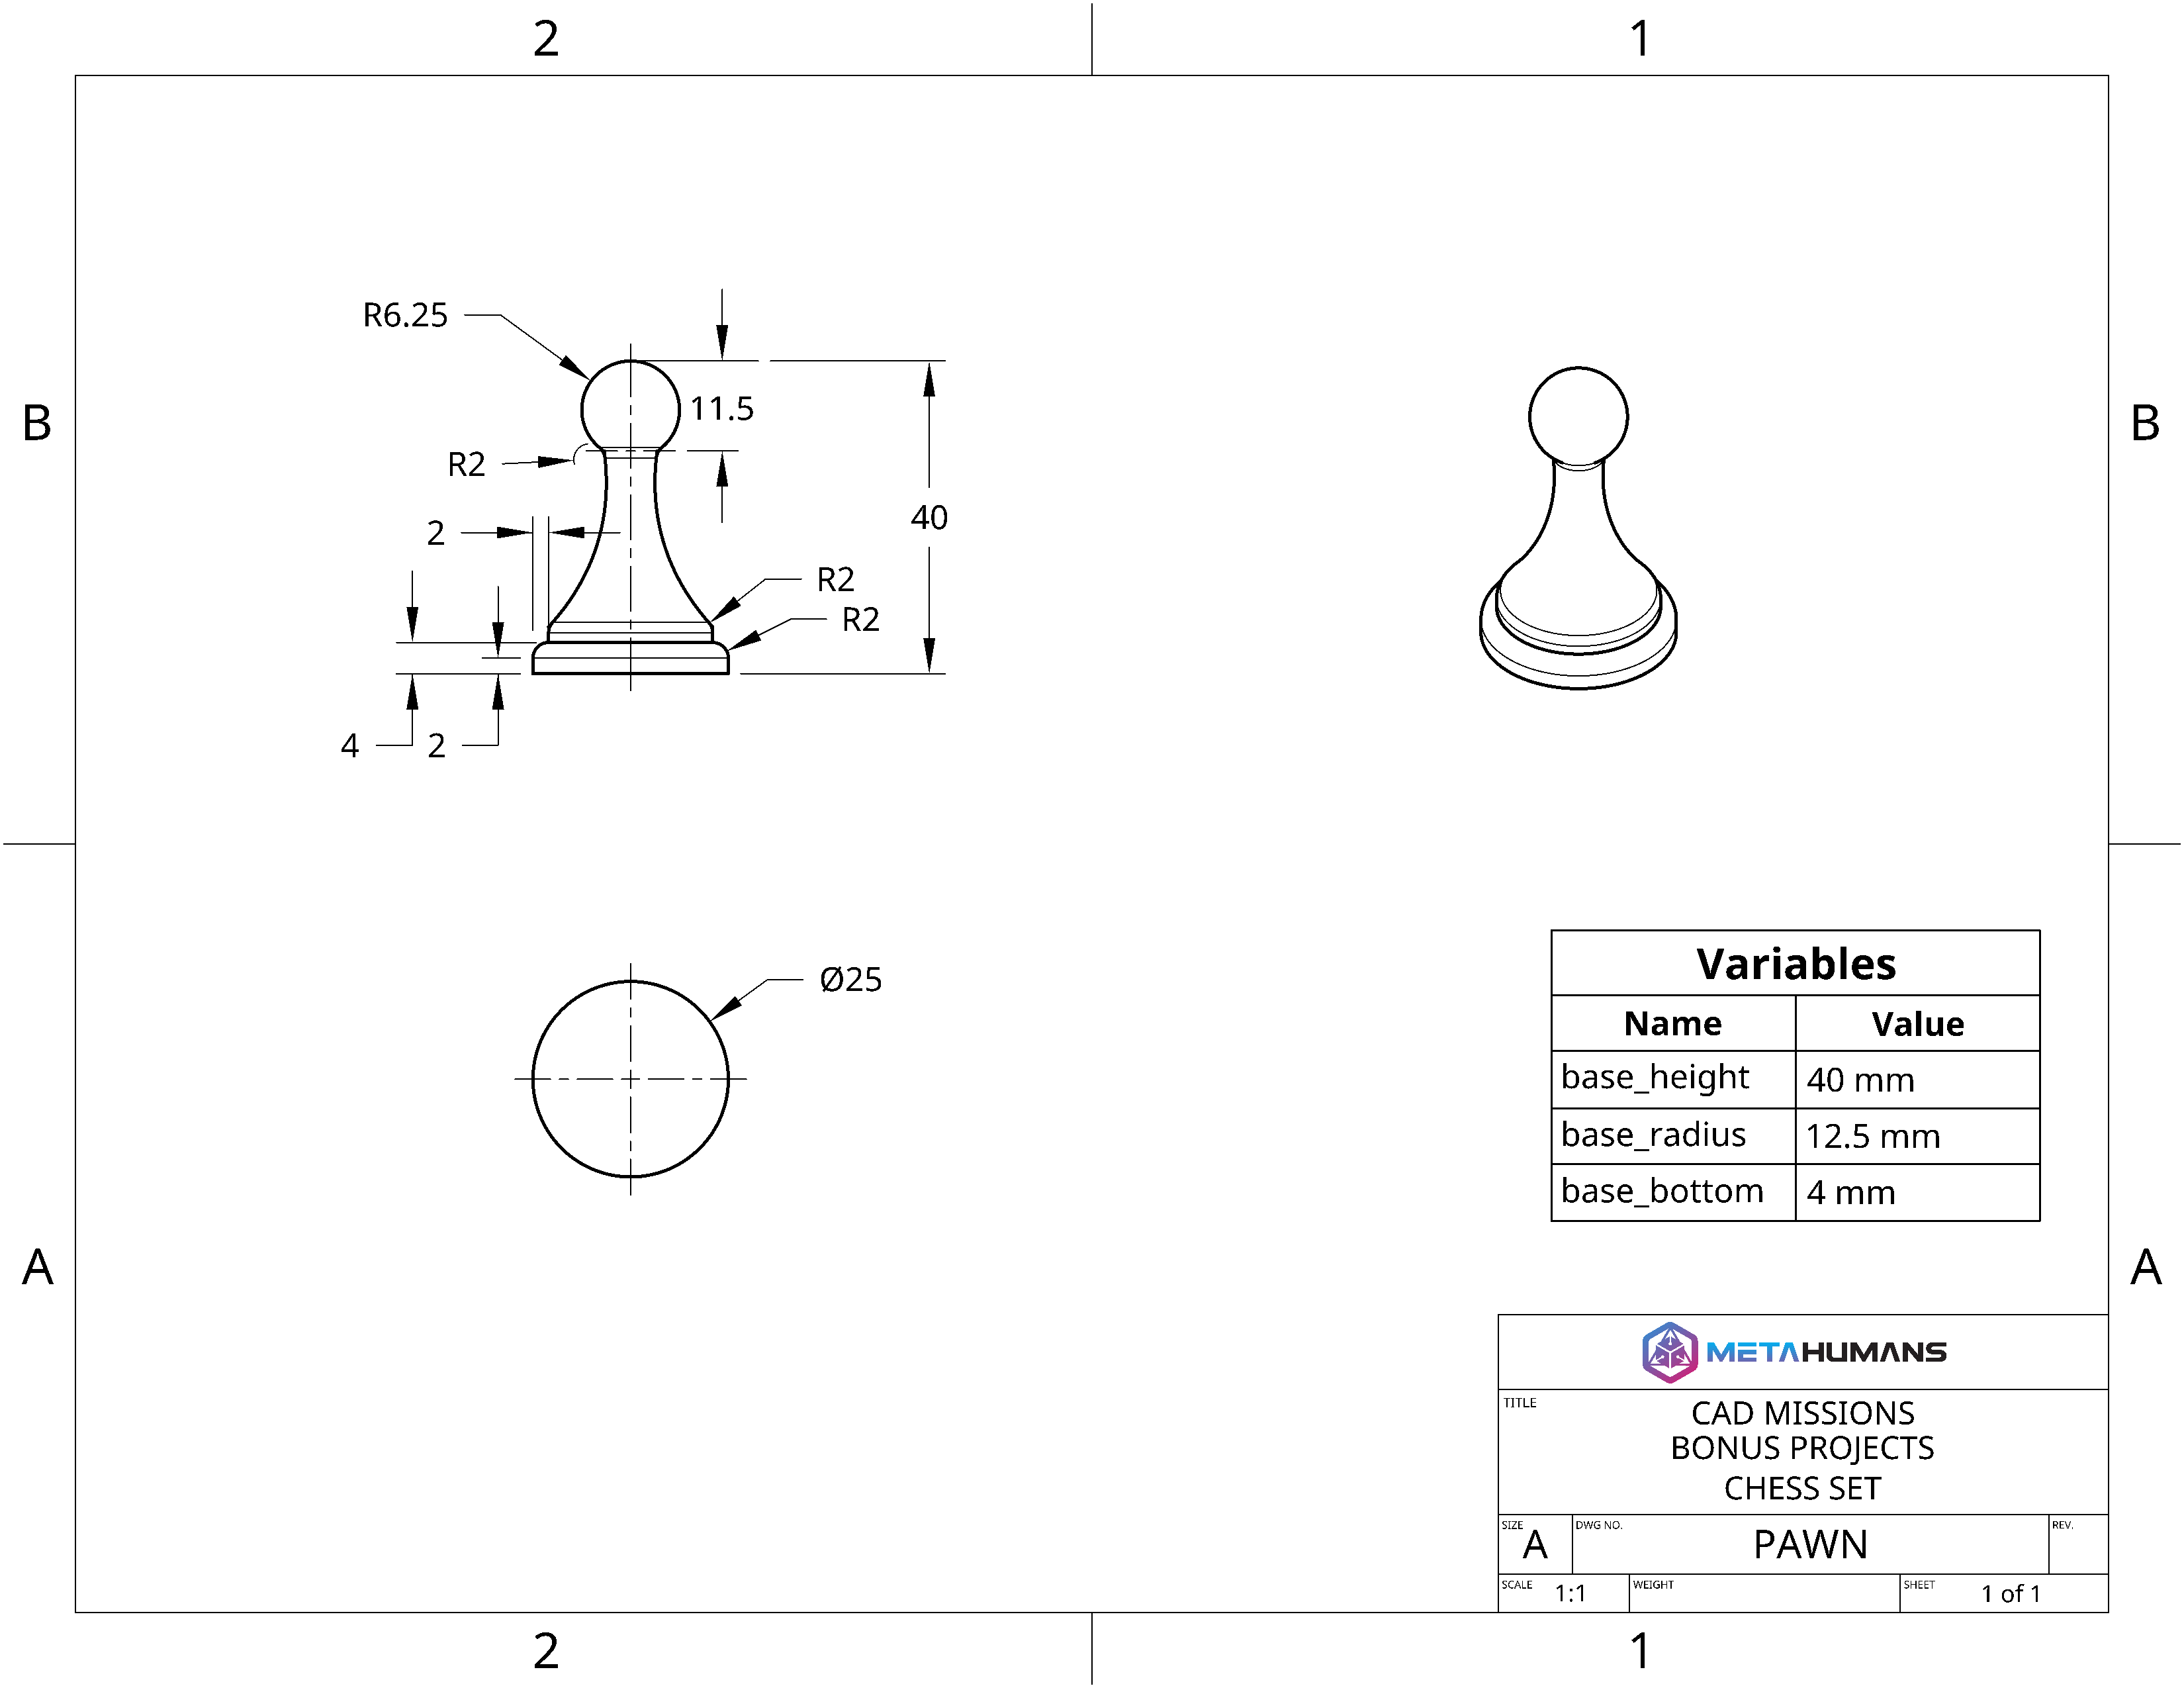
A pawn is the simplest chess piece yet contains most of the techniques you’ll reuse on more complex models: sketching with reference geometry, revolving a profile, adding fillets, and (most importantly) driving the entire design with named variables. Master it once and you’ll breeze through the rook, knight, and beyond (Ok maybe not the knight... that one is tougher).
At-a-Glance Specs
| Parameter | Default Value | Purpose |
|---|---|---|
#height |
40 mm | Overall height of the pawn |
#radius |
12.5 mm | |
#bottom |
4 mm | Thickness of the bottom “ring” |
Feel free to rename or add more; every dimension in the model references these three core variables.
Step-by-Step Build
1. Prep the workspace
-
Hide extra planes so only Front, Top, and Right remain visible.
-
Sketch a 48 mm reference square (standard chess-board cell) off to the side; this keeps scale visible while you model.
2. Sketch the pawn profile (Front Plane)
-
Draw a centerline straight up—this will become the revolve axis.
-
Mark the critical heights measured from the bottom: Height 40 mm, Bottom step 4 mm, Radius 12.5 mm.
-
Spline through those points to sculpt the silhouette; tweak control handles until it looks right.
3. Revolve
Select the sketch and run Revolve around the vertical centerline to create the solid pawn.
4. Add edge fillets
Apply a 2 mm fillet to the base edges and the shoulder ridge for a polished, printable finish.
5. Introduce variables
-
Double-click each dimension and replace the numeric value with the variable symbol
#. -
Create or select:
#height,#radius,#bottom. - You can use simple math: #radius / 2 or #radius - 1 mm.
Variables now live in the Variable Table (fx icon) where you can edit them any time.
6. Stress-test your parametrics
-
Change
#heightfrom 40 → 60 mm — the pawn stretches but remains perfectly proportioned. -
Drop it to 20 mm — still watertight, still printable.
That’s the power of a fully-parametric model.
7. Export for 3D printing
Right-click the Part Studio → Export… → STL. Use millimeters, binary, fine resolution for best results.
Best Practices Recap
-
Name every sketch and feature so the timeline is self-documenting.
-
Keep your variable list short and meaningful; derive everything else with formulas.
-
Model at real-world size (mm), even if you’ll shrink/enlarge later.
-
Hide construction aids (planes, sketches, reference square) before exporting to keep STLs clean.
Ready for the next piece?
This pawn sets the foundation for the rest of the set. In the coming lessons you’ll reuse the same three variables to crank out the rook, bishop, and knight, each in minutes, not hours.
Remember to share your designs in our Community!
Happy modeling, and see you in the next mission!
Excited about making your ideas into real 3D printed objects?
Get started today with Mission One... it's free!
Stay connected with news and updates!
Join our mailing list to receive the latest news and updates from our team.
Don't worry, your information will not be shared.
We hate SPAM. We will never sell your information, for any reason.